Wednesday, October 29, 2008

What is a static route and how do I use it?

Static Routing

When using the ip route command, you can identify where packets should be routed to in two ways:

  • The next-hop address

  • The exit interface

Both ways are shown in both the "Configuration Example: Static Routes" section and the "Default Routing" section.

Router(config)#ip route 172.16.20.0 255.255.255.0 172.16.10.2

172.16.20.0 = destination network

255.255.255.0 = subnet mask

172.16.10.2 = next-hop address

Read this to say: To get to the destination network of 172.16.20.0, with a subnet mask of 255.255.255.0, send all packets to 172.16.10.2

Router(config)#ip route 172.16.20.0 255.255.255.0 s0/0

172.16.20.0 = destination network

255.255.255.0 = subnet mask

s0/0 = exit interface

Read this to say: To get to the destination network of 172.16.20.0, with a subnet mask of 255.255.255.0, send all packets out interface Serial 0/0


Why do I want to use static routes when there are neat routing protocols like OSPF?
- static routes are easy, no overhead either on the link or the the CPU of the router. They also offer good security when coupled with a tight IP mask like 252 which gives only 2 hosts on a given link

How to configure DHCP server on Cisco Routers and switches with Cisco IOS

DHCP, Dynamic Host Configuration Protocol is the protocol used by network devices like a PC or a printer (DHCP clients) to obtain IP Address, Default Gateway, Domain Name, DNS Servers, NetBIOS servers and more that helps the device to work properly in an IP Network.

While in an ideal scenario, most if not all organisations run the DHCP server on a Windows server or a Linux/Unix server. While this is justfiable in bigger corporate and enterprise networks, a smaller network like a branch office can be supported by a local Router, Switch or a Firewall can run a DHCP server without the need of an additional server hardware to run DHCP. Most of the routers, firewalls and some switches do have a DHCP server builtin. Most of the new Cisco Routers and Switches running Cisco IOS can run a DHCP server.

The following procedure helps you to setup a Cisco Router or a Catalyst Switch as DHCP server (I use a Cisco Router here):

Enable DHCP Service on the Router

dhcp-router# conf t

dhcp-router(config)# service dhcp

Create DHCP IP Pool

dhcp-router(config)# ip dhcp pool IP-POOL

where IP-POOL is the name of the DHCP IP Pool

Add Network & subnet mask to the DHCP Pool


dhcp-router(dhcp-config)# network 192.168.1.0 /24

Add Default Gateway for the clients

dhcp-router(dhcp-config)# default-router

Specify the Domain Name for the clients

dhcp-router(dhcp-config)# domain-name mycompany.com

Specify the DNS Servers for the Clients

dhcp-router(dhcp-config)# dns-server 192.168.1.10 192.168.1.11

where 192.16.1.10&11 are the IP address of the local DNS servers

Specify the NetBIOS WINS Servers for the Clients (if any)

dhcp-router(dhcp-config)# netbios-name-server 192.168.1.12

where 192.16.1.12 is the Microsoft WINS server

Set the lease period

dhcp-router(dhcp-config)# lease 8

Sets the Lease for 8 days.

Add Exclusion list (if any)

dhcp-router(config)# ip dhcp exclude-address 192.168.1.25 192.168.1.35

Where 192.168.1.25 & 192.168.1.35 are the Start and End IPs for the range of IPs to be excluded.

This will configure the DHCP server on a Cisco Router or Switch.

Sunday, October 26, 2008

How setup da MRTG 2.16.2 to Windows

To get MRTG to work on Windows you need the following:

  • A current copy of Perl. For Example ActivePerl 5.8.8 from ActiveState http://www.activestate.com/store/activeperl/download/

  • The latest version of MRTG from http://oss.oetiker.ch/mrtg/pub. Look for mrtg-2.16.2.zip or better. The archive also contains a precompiled copy of rateup.exe for Win32.

First

Unzip MRTG to C:\mrtg-2.16.2 on the Windows machine of your choice.

Next

Install Perl on the same Windows machine. You might want to make sure that the Perl binary directory is listed in your system path.

 C:\Perl\bin;%SystemRoot%\system32;%SystemRoot%;...

To see if everything is installed properly you can open a Command Shell and go into c:\mrtg-2.16.2\bin. Type:

perl mrtg


CONFIGURING MRTG

Now it is time to create a configuration for MRTG. But before we begin you need to know a few things. Take an opportunity to gather the following information:

  • The IP address or hostname and the SNMP port number, (if non standard), of the device you want to monitor.
  • If you want to monitor something other than bytes in and out, you must also know the SNMPOID of what you want to monitor.
  • Finally you need to know the read-only SNMP community string for your device. If you don't know it, try public, that is the default.

The first thing we do in setting up MRTG is making a default config file. Get to a cmd prompt and change to the c:\mrtg-2.16.2\bin directory. Type the following command:

 perl cfgmaker public@10.10.10.1 --global "WorkDir: c:\www\mrtg" --output mrtg.cfg

This creates an initial MRTG config file for you. Note that in this file all interfaces of your router will be stored by number. Unfortunately, these numbers are likely to change whenever you reconfigure your router. In order to work around this you can get cfgmaker to produce a configuration which is based on Ip numbers, or even Interface Descriptions. Check cfgmaker

If you get an error message complaining about no such name or no response, your community name is probably wrong.

Now, let's take a look at the mrtg.cfg file that was created.

In Perl, a # is a comment, synonymous with REM in DOS.

Add the following to the top of the mrtg.cfg file:

WorkDir: c:\www\mrtg

MAKE MRTG RUN ALL THE TIME

Starting MRTG by hand every time you want to run it is not going to make you happy I guess.

There is a special option you can set in the MRTG configuration file so so that MRTG will not terminate after it was started. Instead it will wait for 5 minutes and then run again.

Add the option

 RunAsDaemon: yes

to your mrtg.cfg file and start it with:

 start /Dc:\mrtg-2.16.2\bin wperl mrtg --logging=eventlog mrtg.cfg

Additional Prerequisites


Preparation

Please complete the following steps before starting the installation:

  • Copy srvany.exe and instsrv.exe to c:\mrtg\bin\ (your MRTG bin directory).
  • Create a file called mrtg.reg anywhere on your system and paste the following content into it:

    Windows Registry Editor Version 5.00
    [HKEY_LOCAL_MACHINE\SYSTEM\CurrentControlSet\Services\MRTG\Parameters]
     "Application"="c:\\perl\\bin\\wperl.exe"
    "AppParameters"="c:\\mrtg\\bin\\mrtg --logging=eventlog c:\\mrtg\\bin\\mrtg.cfg"
    "AppDirectory"="c:\\mrtg\\bin\\"

Service Installation

Once again, assuming that MRTG is already fully installed and configured on the target system under c:\mrtg\ the following steps are necessary to setup MRTG as a service.

Using the command prompt go into the temporary directory where you unzipped the package. When there type the following command to create a service named "MRTG" in the Windows Services management console:

instsrv MRTG c:\mrtg\bin\srvany.exe

Now you need to create the App* entries required for the new service. You can do this by either right-clicking on the mrtg.reg file and selecting 'merge' or by running the following command:

 regedit /s mrtg.reg


Friday, October 24, 2008

How to have root access to callmanager 6.x and 7.x Testing

There is 2 ways to do this.

-One is to modify the permission of the grub configuration using a Knoppix CD, then
becoming a "semi" root and then injecting the newly created user to the shadow
and passwd files. Now this option is also a great option specially
when you have 2 versions Of Unified Communications Manager running
on the BOX, for example UC 6.X in the inactive partition and UC 7 in
the active partition, the complete process will be in the other lesson :), this process
is a little bit complicated but it works like a champ when you have
2 versions running in the server, also you will need to know the
partition structure to boot up succesfully, although after trying
couple of times I found out that you will need to boot from the
/dev/sda2 single to gain complete access, if you boot from another
sda's, root will not perform as "super root" this one took me a
while to find out.

-Before proceeding I am assuming that you have already a working
Unified Communications Manager 6 or 7 running in an approved MCS server.
-Download an iso of CentOS 5.2 CD DIsk 1
-Transfer the image to a CD
-Insert the CD into the Drive
-Turn on the Server
-Let the server boot from the CD
-On the CentOS startup screen, type linux rescue and press enter
boot: linux rescue
-Select the appropiate language
-Select the Country
-Select if you want to start the network service or not, if so
-Highlight eth0
-Configure eth0
-Continue the pre-boot process
-The server will continue the booting process until you are in the shell
-Once in the shell type
#chroot /mnt/sysimage
#lsattr /etc/passwd /etc/group /etc/shadow /etc/gshadow
#chattr -i /etc/passwd /etc/shadow /etc/group /etc/gshadow
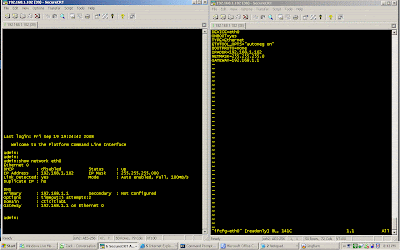
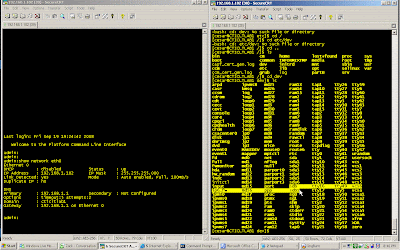
#useradd [enter a desire username] <---such as cesar #passwd [enter the newly desired username] <----this will create a password for the new user twice #usermod -g root [your new username] <---this will add this user to the root group, although you are not a real superuser, but you can move around freely connecting to the unified communications manager console. #service network start <---this will really start the network services #service sshd start <-----this will start the ssh server #ifup eth0 <------this will turn up the eth0 for sure! Great, we are almost done, now while you are here you can do the following -Mount a USB Drive for example, so you can copy files between the server and your USB drive. -To do this. -Insert the USB drive -while on the shell type #cd /etc/dev #ls -Look for the newly mounted USB drive, it should be something like (sdb1), if so proceed to mount the usb drive by doing the following: #mount sdb1 /mnt/usb -Your USB drive should now be mounted and ready for use. You can also mount the USB drive permanently as well, but thats on a later lesson... -Remenber that this newly created account it will not let you do much, but you can browse around while using the new user and remotely via ssh. Now if you want to modify a file remotely and this file is secured..You may need to log in as root first, change the permission of the file, so you can later modify the file using the new user account you just created. How to change a file permissions? #chmod 777 [filename] -It will be a good idea to put the file back to the original permissions settings after you have modify it, this just to keep the integrity of the file structure. :::::::::::::::::::::::;Please read carefully before doing anything else::::::::: Anything you do from here it may cause the Unified Communications Manager not to start!! -Now while on the root shell you can change the permissions on any file you want to modify, remenber you cant do this on the user you just have created...this is because you will still need to move out the root account out of the equation by doing the following #usermod -u 20000 root #usermod -u 0 [your new username] ****NOTE:At this point you are now the super user of the box, but when you do this Unified communications Manager may not start properly...So BECAREFUL!! -Also while in root we can go ahead and modify iptables for example to install webmin and manage the box via web port 10000, although you may need to install couple of other scripts, but not hard. Also if you are not a "vi" fanatic, go ahead and install nano via usb or by using the wget command, again you may also need some other scripts to run nano, and of course access to the internet. *Also FYI The platform user belongs to the following groups. administration sftpuser platform tomcat ccmbase ccmsyslog The root user belongs to the following groups. Wheel root bin daemon sys adm disk -Remenber how you allocate your user and groups, it will mandate it's access.


*****************UPDATE*************************************


After reviewing several corners, I thought, wait why add another user, play
with the groups allocations and all that, when can just access the Unified Communications
Manager like a member of Cisco TAC would?, I mean what I am trying to accomplish
here is to access the box and at the same time maintain the integrity of the box
as much as possible, without modifying too many things on the UCM server platform

So, I will call this the Remote Account Process.

On a working server or environment we will do the following:
-Connect to the UCM Console using an SSH Client
-Proceed to a enable a remote account
admin:utils remote_account enable
-Proceed to create a remote_account user
admin:utils remote_account create [ournew_remote_account_username] [amount of day's that
we want this account to remain active]
example
admin:utils remote_account create ciscotac 30
-the above example will create a remote account user named ciscotac and it will be valid
for 30 days.
-Once we have succesfully created a remote_account we will proceed to reboot the server
cleanly.
admin:utils system restart
-Proceed to insert the CentOS 5.2 Disk 1
-on the Boot option enter linux rescue
boot:linux rescue
-Once you are in the linux shell
-Proceed to do the following
#lsattr /etc/passwd /etc/group /etc/shadow /etc/gshadow
#chattr -i /etc/passwd /etc/shadow /etc/group /etc/gshadow
#passwd [enter the username that you have created for the remote account user]
-Enter the new password that you want for the new remote account user twice
-eject the CentOS 5.2 DISK 1
-Reboot the server by doing the following
#shutdown -r now
-Once Unified Communications Manager have completed rebooted, simply using an SSH
client login to UCM using the remote account username and password, you will see
the following message

Thursday, October 23, 2008

Download Learn To Speak English Version 8.1

Achieve all-around English fluency with this complete, in-depth learning system. Learn To Speak English Version 8.1 is a four CD-ROM set containing four courses with over 100 exercises and covering topics such as basics, travel, business, and everyday. Build skills in pronunciation, vocabulary, listening, speaking, reading, writing, and grammar. Using a unique personalized learning system, you will have custom instruction tailored to suit your study needs.

Features:

* 100+ lessons
* Talking dictionary with 10,000+ words
* Additional Internet lessons
* Pre-assessment test
* Adjustable study plan
* Progress tracking

Product Features

* Learn to speak English
* Over 100 lessons build fluency
* Perfect your pronunciation with voice recognition technology
* Adjustable study plan, talking dictionary, cultural video clips, and more
* 4 CD set includes conversational CD

Build your fluency in English with this feature-rich four-CD collection. Learn to Speak English's 100 lessons and adjustable study plan expand your English vocabulary and perfect your pronunciation.

Choose from a variety of instructional features, including cultural video clips and a talking dictionary. Learn to Speak's voice recording, playback tools, and speech recognition technology let you practice your English, develop your ear, and hone your pronunciation. A conversational CD completes the collection, adding a final polish to your newly acquired abilities.

With Learn To Speak English shows new English speakers how to speak like a native in no time! Any user becomes a skilled English-speaker with this comprehensive language study aid!
Download CD 1 RS or MU


CODE
http://www.rapidsafe.net/rc-QGNxUzM0UTM/WarezHound_EE1.part1.rar
http://www.rapidsafe.net/rc-gTOwYzM0UTM/WarezHound_EE1.part2.rar
http://www.rapidsafe.net/rc-QmZxczM0UTM/WarezHound_EE1.part3.rar
http://www.rapidsafe.net/rc-UjNwQzM0UTM/WarezHound_EE1.part4.rar
OR
http://www.megaupload.com/?d=760AYL9C
http://www.megaupload.com/?d=ENE73Z7E
http://www.megaupload.com/?d=68EVUDXJ
http://www.megaupload.com/?d=0QAZKC5X

Rar pass: WarezHound

Download CD 2 RS or MU


CODE
http://www.rapidsafe.net/rc-UWNyQ2M0UTM/WarezHound_EE2.part1.rar
http://www.rapidsafe.net/rc-EjZ1E2M0UTM/WarezHound_EE2.part2.rar
http://www.rapidsafe.net/rc-U2YhJ2M0UTM/WarezHound_EE2.part3.rar
http://www.rapidsafe.net/rc-UjMzkzM0UTM/WarezHound_EE2.part4.rar
http://www.rapidsafe.net/rc-gDMhV2M0UTM/WarezHound_EE2.part5.rar
http://www.rapidsafe.net/rc-MTMiZ2M0UTM/WarezHound_EE2.part6.rar
OR
http://www.megaupload.com/?d=O2KKDTE0
http://www.megaupload.com/?d=JR03VPKS
http://www.megaupload.com/?d=CRBMI3WP
http://www.megaupload.com/?d=FH34PU79
http://www.megaupload.com/?d=VGAWJ9D1
http://www.megaupload.com/?d=6A83O4R7

Rar pass: WarezHound

Download CD 3 RS or MU


CODE
http://www.rapidsafe.net/rc-ImNxEmM0UTM/WarezHound_EE3.part1.rar
http://www.rapidsafe.net/rc-UjNjJjM0UTM/WarezHound_EE3.part2.rar
http://www.rapidsafe.net/rc-QzM3AjM0UTM/WarezHound_EE3.part3.rar
http://www.rapidsafe.net/rc-cDM0YjM0UTM/WarezHound_EE3.part4.rar
http://www.rapidsafe.net/rc-kTY4cjM0UTM/WarezHound_EE3.part5.rar
http://www.rapidsafe.net/rc-ATMhRjM0UTM/WarezHound_EE3.part6.rar
http://www.rapidsafe.net/rc-MGNwUjM0UTM/WarezHound_EE3.part7.rar
OR
http://www.megaupload.com/?d=257P3OPV
http://www.megaupload.com/?d=W5P2BX7U
http://www.megaupload.com/?d=AWXE22XN
http://www.megaupload.com/?d=P3BDPJW9
http://www.megaupload.com/?d=Y5Z0U2N1
http://www.megaupload.com/?d=EXYXU03I
http://www.megaupload.com/?d=OZX0TVZ0

Rar pass: WarezHound

Download CD 4 RS or MU


CODE
http://www.rapidsafe.net/rc-YWNkVmM0UTM/WarezHound_EE4.part1.rar
http://www.rapidsafe.net/rc-UWNmZmM0UTM/WarezHound_EE4.part2.rar
http://www.rapidsafe.net/rc-IGOmFmM0UTM/WarezHound_EE4.part3.rar
http://www.rapidsafe.net/rc-MTNwgjM0UTM/WarezHound_EE4.part4.rar
http://www.rapidsafe.net/rc-UGNkhjM0UTM/WarezHound_EE4.part5.rar
http://www.rapidsafe.net/rc-ITYhljM0UTM/WarezHound_EE4.part6.rar
OR
http://www.megaupload.com/?d=BORVC8CE
http://www.megaupload.com/?d=EMI39QLS
http://www.megaupload.com/?d=1AGG6RF6
http://www.megaupload.com/?d=09TWWYD3
http://www.megaupload.com/?d=1EY7EVUN
http://www.megaupload.com/?d=HQNY2OZF


Rar pass: WarezHound

CCM 5.o Password Reset

You must have physical access to the console - ssh won't work.

1. Make sure there's nothing in the DVD drive to start with.
2. Log onto the system via the console with the account name
"pwrecovery" and the password "pwreset"
3. Insert UC Mgr. DVD
4. The utility will tell you what the login is and prompt you to
change the password. The password must be at least 6 characters long and
not trivial.

The another PROBLEM :(

When after install the CCM who know access the configuration files? I coudnt access the files . IF any one know that please tell me.....There we install on linux os..so how do that??

Wednesday, October 22, 2008

How to install Call Manager 6.x in VMWare

Installing CUCM 6.x in VMWare is much easier. Cisco did a great job with CUCM 6.x in terms of allowing you to install the software in a virtual machine without needing to hack the system.


There are not really any tricks to installing Cisco Communications Manager 6.x in VMWare. I have used vmware player with easyvmx.com as well as VMWare Server.

Update: This is not mentioned in the video, but I have noticed very strange issues when using a SCSI hard drive for CUCM. A SCSI hard drive is created by default. You will need to delete the SCSI hard drive, create a new hard drive and select IDE.

Here are the basic steps:

1. Create a virtual machine with your favorite VMWare Product
2. Configure the virtual machine with enough disk space and RAM to meet CUCM installation requirements
3. Insert your CUCM 6.x installation CD
4. Complete the Installation Wizard
5. Wait for the install to complete

If you have the CDs, you can create an ISO from the CDs with LC ISOCreator

If you do not have the CDs, you might search the following websites
http://www.sadikhov.com
http://thepiratebay.org
http://isohunt.com

Tuesday, October 14, 2008

Hungry People Can't Lead

Before a person can Lead Without Title and shine at work/life, they need food in their belly. For so many of us, this just isn't an issue. But for far too many, it is. Last night over a billion people went to sleep hungry. That just isn't acceptable in our world.

You've probably read that rice prices are soaring. This affects the organizations delivering food aid to nations in need, in a profound way. "The UN has issued an urgent plea for food aid...the agency's World Food Program, which dispenses food to developing countries, said it needs an additional $755 million US just to meet its annual target. The sudden rise in the prices for corn, wheat, rice and soybeans has sparked violent protests in Haiti, Africa and parts of Asia." (Source: The Globe and Mail, Saturday April 26).

So what will you do about this? Please don't tell me you don't have the power to make things better. You do. One person can influence so many. One person really can have a massive impact. One person really can change the world. And the world needs your help. It's not about your title. It's about your willingness to make a difference. And stand up.

The Bigger the Monument, The Longer It Takes

Took about 20 years to build the Taj Mahal. Took years and years to build the Great Pyramids. Seemed like an eternity until The Great Wall of China was done. The larger the dream, the longer it takes. And the more patience becomes mission-critical for you.

Maybe, as you read this blog today, you are feeling frustration over the fact that your richly imagined future is not your current reality. Yet. If so, I encourage you to remember that the best things take a little longer. And if achieving bold and beautiful things were easy - then everyone would be doing it.

BlogCatalog

Technology Blogs - BlogCatalog Blog Directory